Easy DIY Easter Egg

IMG_0232

I love spring, I love the cute colours & of course all the chocolate the easter bunny brings. I remember being a kid and being so excited to make easter eggs.. but after a week they were gross and we had to throw them out. This was always very upsetting because I was always so proud of my art work that it felt like such a shame throwing it away.

Now as a 22 year old adult, I still love decorating easter eggs. I’m gonna show you how I made some super cute eggs that can be packed up and saved for next year! These are great for making for kids too, they won’t break if they’re dropped! So let’s get started!
IMG_0214

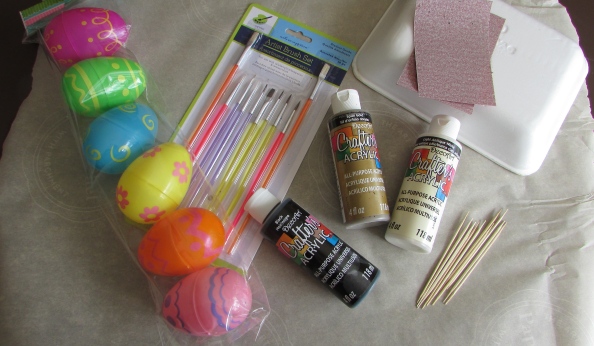
Most of the supplies I found at my local dollar store & at home!

  1. Plastic Eggs, 6pk $1.25 CAD
  2. Paint brushes, 1o pk $1.25 CAD (or anything to paint with)
  3. Any acrylic paint $1.25 CAD each, I choose white, gold & black
  4. Sand paper *very* important, tooth picks, styrofoam meat container (clean) & paper to protect your table *all this was found at home.
  5. Glue, I forgot to picture this but any glue will work. I found super glue and used that.


  • Step 1: Open up the eggs and glue them shut, this will make sure that they don’t come apart and wreck the design!
  • Step 2: This is very important! Sand the eggs so that they are no longer shiny. If you don’t the paint will have a very difficult time sticking to the eggs.
  • Step 3: My eggs had holes in the bottom, I took toothpicks and put them through the holes and then placed them in the styrofoam. This was so that they could dry better.


  • Step 4: Start painting your base layer, I choose white. My eggs needed about 4 coats of paint in total so this is the boring part. If making these for kids I suggest doing this before hand so they are ready for them to paint right away!


  • Step 5: This is the fun part, painting your pretty little eggies! I choose black & gold for my designs. You can do dots, stripes, chevron, cute sayings or anything you want. The possibilities are endless! Using some white glue and glitter would be super cute as well! I usually use glitter for everything but I wanted to keep these eggs simple.


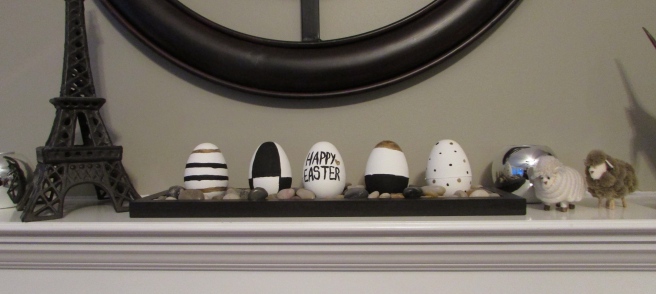
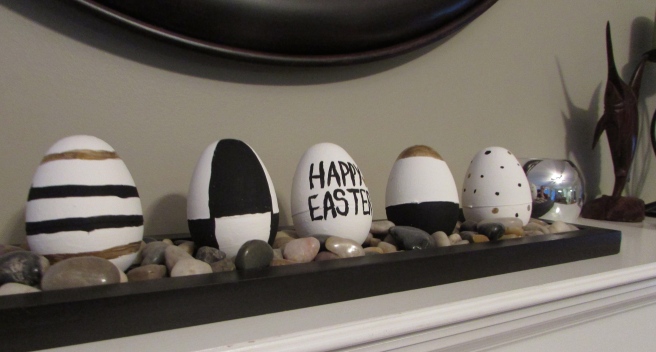
These were the designs I did for my eggs! I loved the gold & black on the white. I found it very classy and almost “Kate Spade-Esque” I let these sit over night to make sure they were 100% dry before moving them. If you wanted a shiny finish you could defiantly spray them with some clear paint spray or sealing spray. I like the matte look personally.
 

IMG_0230

I am so in love with the end result! These are so cute & so easy to make. I hope you all have a great easter weekend and the easter bunny brings you lots of chocolate!

 

IMG_7656


Top 5 spring Nail Polishes (ChinaGlaze)

FullSizeRender

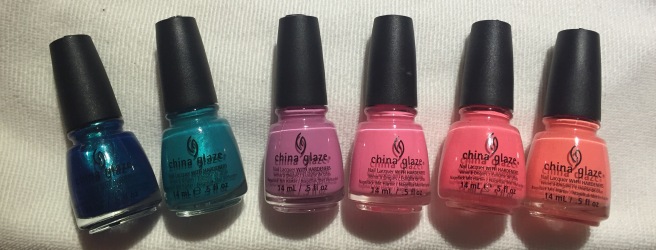
When the snow is all gone & the sun is finally shining, toes and fun spring colours come out! I love changing up my polish whenever the season changes. As  a nail tech though, I wear gel on my fingernails year round as it is much stronger for me to work with. My toes however, change quite often! Here’s my top 5 polishes for my toes this spring, don’t be fooled because there is 6 polishes in the photo.. read on to figure out why!

Sexy in the City: I absolutely love this blue, it has the perfect amount of shimmer! It may look dark in the bottle but it is the perfect shade for when your toes are still a little pale! Although is is shiny on its own, I do suggest always using a top coat for extra protection.

Turned up Turquoise: Turquoise is always in style! It’s a fun shade that goes with just about anything I find! This one also has a bit of a shimmer but dries on the matte side. I defiantly suggest using a top coat with this!

Dance Baby: This baby pink is great food spring (also looks great with a tan) It’s super bright and has a lovely purple tone to it. Making it great for those who are not into barbie pinks! Again, use a top coat with it for extra protection!

Shocking Pink: Now here’s your barbie pink! Not quite as bright but is a nice spring transition before the brights come out for summer. I’ll say it again.. TOP COAT THIS

Flip Flop Fantasy: This is where there is 2.. Because they have the same name. This colour is also one of the more famous of ChinaGlaze polishes. I don’t know why but they changed it.. I still love the colour though. The original formula was a beeeeautiful coral pink, I do not let anyone touch this one. It is my baby and for me only! The newer formula is more of a peach which is also very pretty! This one is a top coat must! It will chip very fast if you do not top coat it.


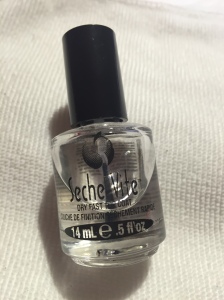
You can use a base coat if you like, I find they help prep the nail & help against staining. I change my polish so much that I’m usually too lazy to apply one shhhhh. However, top coat is a MUST with ChinaGlaze, they chip very easily. I will post a picture below of my favourite top coat.

IMG_7808

Seche Vite Fast Drying Top Coat: This is a must have! Dries very quickly and creates a beautiful shine! It is also very strong and durable!


All the ChinaGlaze polishes are available for $8.25 CAD on http://www.nailpolishcanada.com they also have free shipping on orders more than $25 & it is a canadian website so if you’re ordering from canada.. No duty or crazy exchange rates!!

Seche Vite is also available on http://www.nailpolishcanada.com for $8.95 CAD

For places other than Canada, I suggest looking on Amazon or checking out local beauty supply stores.


Hope you all enjoy your fresh spring toes, xo

The tea addiction.

There’s nothing I enjoy more than a hot cup of tea when I wake up.. with my lunch.. after work.. or before bed. To be honest I don’t think theres’s ever a wrong time for tea. I myself, have over 30 types of tea mostly from DavidsTea. This may seem a tad excessive but personally I don’t think there’s such a thing as too much tea.

IMG_0204

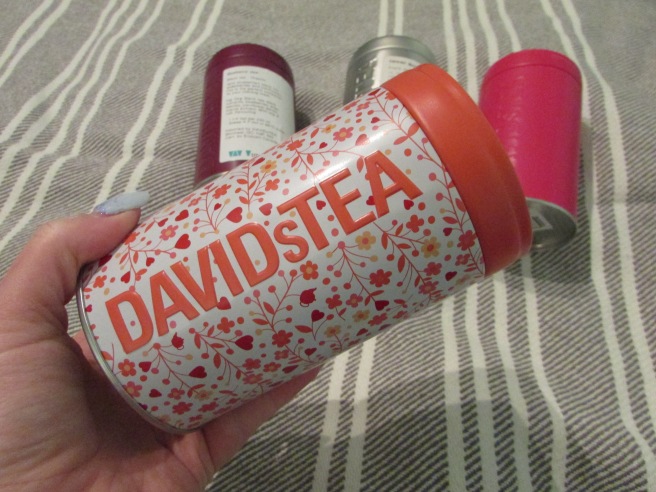
I do have other teas than DavidsTea, but their teas just seem to take up the most room in the cupboard. If you have never been to one of their stores, I highly recommend googling where the closest one is and going straight there. I’ve been to a few different stores and I am always so impressed with the staff there. They are always so helpful with finding the perfect tea selection. The stores are also stocked full of everything you need to prepare your perfect tea experience.  I was able to go through my teas and pick my top 4 and my top tea accessories, all available at DavidsTea!

1.)  Blueberry Jam: This black tea is my favourite tea for the morning. This tea goes perfect with toast & eggs! You don’t need to put much in this tea, I enjoy it black or with a little almond milk & sugar. 50g $8.98 CAD

2.) Santa’s Secret: I don’t know how I just found this tea a few months ago. This tea is my ride or die. This is another black tea with vanilla & the CUTEST little candy cane sprinkles! I bought 150g of this after christmas because it was dirt cheap then (I got 150g for $9 WHAT?)  Unfortunately this tea is only available during the winter but when it comes back you need to get some! 50g $7.50 CAD

3.) Forever Nuts: This herbal tea is the apple pie of all teas.. it seriously tastes like like a warm cup of apple pie but.. liquid form? that does not sound as appetizing as I thought I was. Anyways, this tea is absolutely fantastic though. It has beetroot in it so it turns a lovely shade of pink. Just a little honey and this tea is great for before bed as it has no caffeine in it. 50g $7.98 CAD

4.) Pink Flamingo: Not all tea has to be hot so I thought it would only be right to include my favourite tea for making iced teas. This herbal tea smells just like iced tea mix! It is perfect for hot summer days. The hibiscus flower & tangerine blend together perfectly, this tea also has beetroot in it and it also has carrot! 50g $7.98 CAD

P.S. How cute are these tins?! With every 100g of tea you buy you get a free silver tin, or you can upgrade to a coloured tin for $3 CAD.

IMG_0211

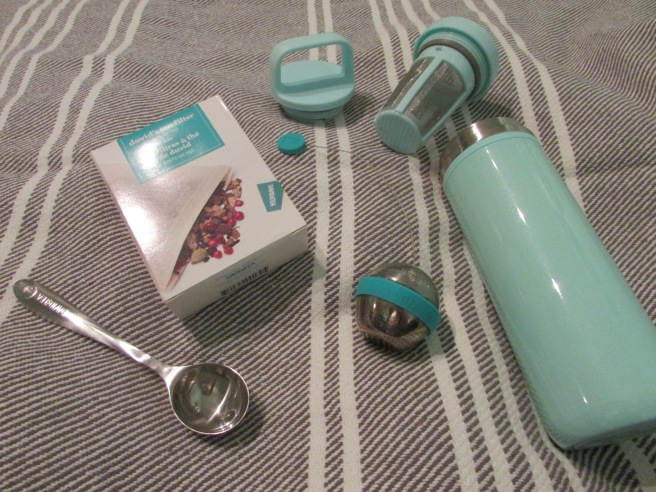
There’s so many ways to make tea, here’s a few tea tools to get your tea time starter:

1.) The Perfect Tea Spoon: Now you don’t actually need THIS spoon, you should use a spoon though to measure or you’ll find yourself using way more than you need. You can use a regular spoon, I got mine in a holiday pack. $6 CAD

2.)  Tea Filters: I try not to use these all the time, so I am not throwing away too much waste. But they are great for when you’re taking tea to go! 100pk $12 CAD

3.) The Perfect Tea Ball: I love using my tea ball for when I’m making tea to enjoy at home. It’s super easy to use and clean! I like that it all comes apart so I can really get it all clean. I also love that I’m not throwing away a tea bag each time. It’s also got vey fine holes so you don’t get any tea chunks in your tea. $10 CAD

4.) The Carry Tea Mug: DavidsTea is always coming out with fun new colours and designs for their tea accessories. I love their to go mugs because they keep your drink as hot or as cold as you want it! They also has a built in steeping chamber so you don’t have to have any waste. I wouldn’t recommend putting black tea in the chamber though as they tend to get bitter over time. These mugs also don’t leak so you can feel free to throw it in your bag for later with no worries of spilling. $32 CAD


IMG_0213

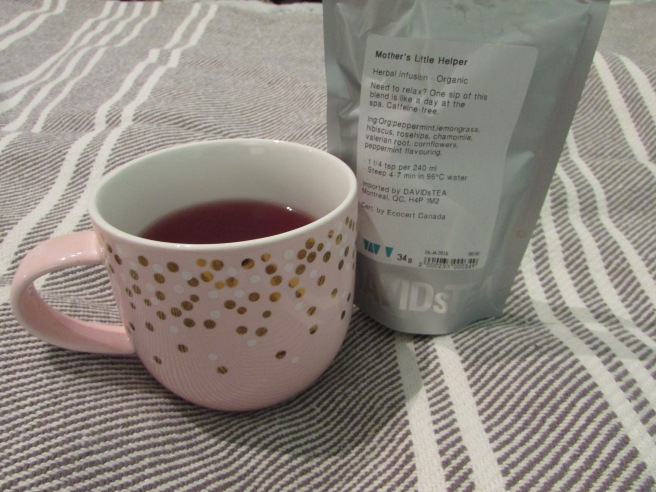
As I sat down to write this I was enjoying a cup of “Mother’s Little Helper” in my adorable dotted cup that I received for Christmas from a lovely friend of mine.

xo Sara