My Favourite Books for Summer Sixteen

So far, this summer has been a little hit or miss. It’s either scorching hot or raining. Either of these make reading a great summer past time. On hot days, it’s great to lay out back on the hammock with a cold drink and enjoy the heat. Although, on the other hand the rain is very relaxing. I love lighting a candle, making a cup of tea & cuddling up in bed with my dogs and a book. Here are a few of my favourite reads:

  1. “White Girl Problems” by Babe Walker $9.99 CAD on amazon for Kindle.
  2. “Psychos” By Babe Walker $16.99 CAD on amazon for Kindle.
  3. “American Babe” by Babe Walker $11.99 CAD on amazon for Kindle.

These 3 books are absolutely hilarious. I was so excited when “American Babe” was released a few weeks ago. If you’re wanting something that is a light read and will have you giggling out loud, this is the book. Written in first person, Barbara “Babe” Walker is a stubborn, spoiled, rich girl that wants everyone to know who she is. In the first book “White Girl Problem” Babe lands herself in rehab with a shopping addiction and begins to write her memoir. In “Psychos,” you go on a adventure around the world as Babe, tries to figure out who she really is. The last book, “American Babe” Babe gets herself stuck in the middle. Middle America that is, and the people she meets there are far from her normal crowd. I highly recommend these books for anyone that is looking for a light & funny read.


  1. “Paper Towns” by John Green $10.99 CAD on amazon for Kindle
  2. “Looking for Alaska” by John Green $10.99 CAD on amazon for Kindle

“Paper Towns” has recently been turned into a movie & of course the book is way better! If you have seen the movie or not, it is defiantly a must! A childhood friendship that dissolved up until high school is brought back to life one night when Margo needs her original partner in crime, Quentin to help right all the wrongs that high school brought. Their crazy adventure ends when Margo goes missing & Quentin won’t rest until she is found. I don’t want to give much away about “Looking for Alaska,” as it is quite the read. It is my favourite of all the books John Green has wrote. Miles Halter lives a boring life until he attends Culver Creek Boarding School and meets the girl down the hall, Alaska Young is unlike any girl he’s ever met & she is going to be the one to turn his life upside down.
 

51LoESiMnmL._SX331_BO1,204,203,200_

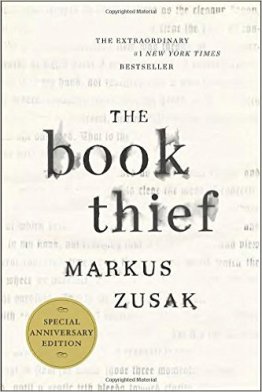
“The Book Thief” by Markus Zuzak $10.99 CAD on amazon for Kindle.

This is the heaviest read in this whole list. I read this book for the first time in 2009 and I have read it at least 5 times since then. I highly recommend NOT watching the movie. It does not compare to the book at all. This story takes place in 1939, Nazi Germany when a young Liesel Meminger is brought into a new family. Her foster father becomes very found of her quickly through their reading lessons in the basement, each book is stolen & tells a different story that keeps Liesel wanting more. The narrator of this story is Death himself, which makes it a bit of a Dark read, although it seems that Death may actually have a heart.


I hope you enjoyed this book list, comment below if you’ve ever read any of these & any book recommendations you have!

img_7656-1


Cleaning Your Make up Brushes

I love doing my make up every morning & sometimes even throughout the day, but there’s nothing worse than dirty make up brushes. I like to try clean my brushes every 1-2 weeks to keep them from getting absolutely disgusting. It took me a while to find a routine that worked perfect for me. With a few tricks I’m now able to clean my brushes super quickly and have them so clean you could eat with them! Well you wouldn’t want to, BUT you could! So let’s see how you’ll get these brushes as clean as can be.

DSC_0006


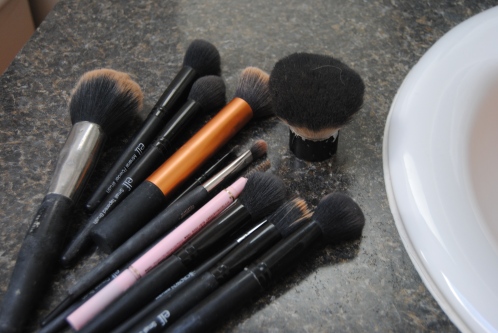
What you will need:

Textured cutting board, basically anything plastic that has lots for small grooves one it. I picked mine up at the dollar store for $2

Plastic soap holder, make sure it has the tall bumps on it, again I picked this up at the dollar store for $2

A couple face cloths

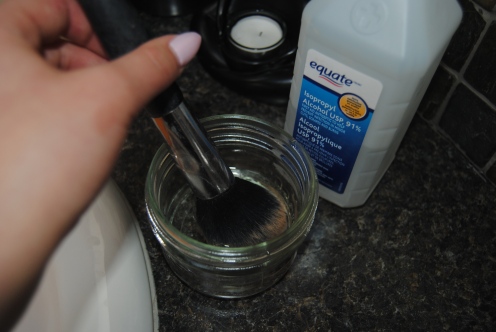
A glass jar or cup, this one is about 4 inches tall and I find it works great• 91% isopropyl alcohol, you can this at basically any drug store. I picked mine up at walmart and it was around 5$

Brush shampoo, baby shampoo works as well and is much more affordable. You can get this one off of shop.janeiredale.ca for $44. It is quite expensive but well worth the money.


How to clean your brushes:
Start off buy pouring some alcohol into the glass jar, you can then dip your brush into this. Make sure just to dip the bristles. You don’t want any liquid getting into where the handle connects to the metal.

DSC_0009

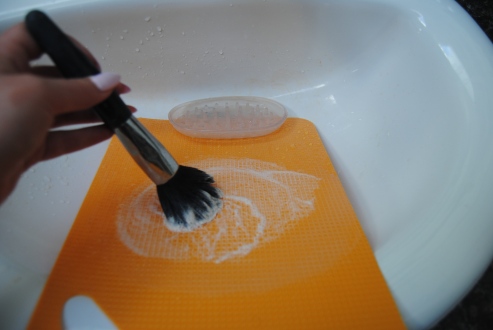
Start rubbing your brush against the cutting board. You will notice lots of the make up coming out of the brush. For larger brushes, you can then use the soap holder, this will get right into it & get all that make up out! After this you can rinse out your brush.


Now your brush will look brand spankin’ new! But this is when I like to use my shampoo, so you can squirt a little bit onto the cutting board. Again,brush it against the board. You could probably skip this step but I like to make them smell nice.

DSC_0015

Wipe your brush on the face cloth & then let them sit over night laying down.

In the morning you should have clean & dry brushes. Believe me, you will not regret doing this. I sometimes find that if I go too long without cleaning then I will start breaking out! So, it is very important! Also, sorry for the awkward photos, it was very hard to use my big nikon with one had while cleaning!

Hope you enjoy your clean brushes,

img_7656-1

NOTW- Nails Of The Week

If you didn’t know, I am a certified gel nail technician. I absolutely love my job. I have a hard time dealing with groups of people & my job allows me to focus my energy on one person at a time! It’s also an amazing outlet for my creativity. I like to think of nails as small canvases that I get to make beautiful! I’m constantly sharing my nails on Facebook & instagram so I thought, well why not on my blog!

So let’s get in to it, here’s a few of my favourites from the last few weeks.

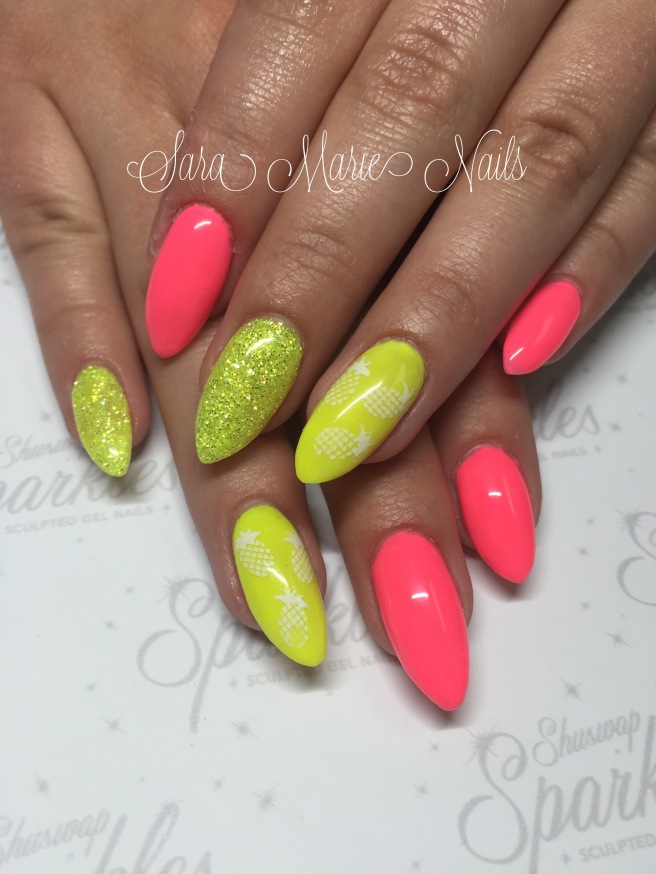
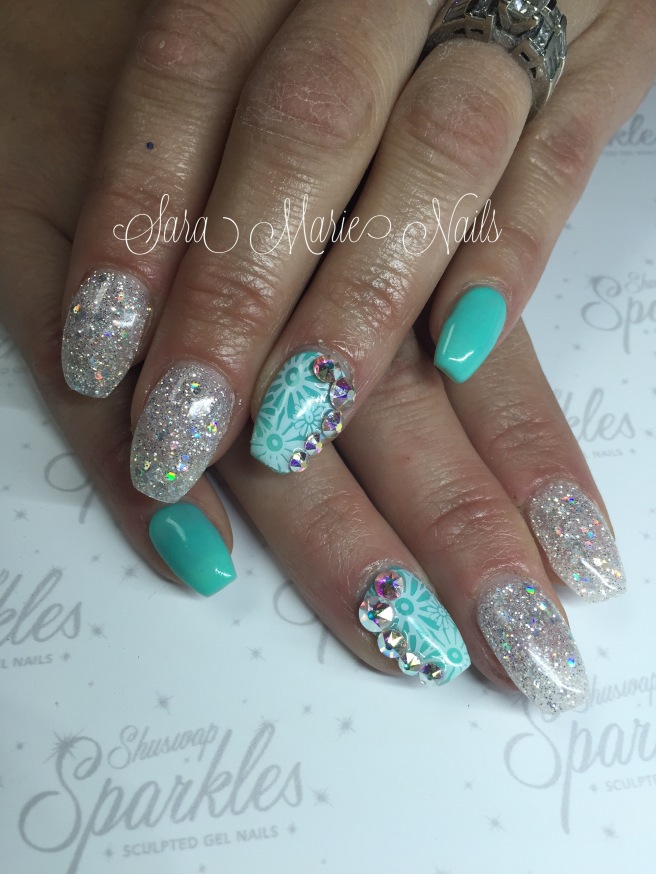
 These are my latest nails, I absolutely love how fun & summery they are! I used all fuzion gels for this look: Lemonade Sparklez gel, Neon yellow & Whoomp, there it is from the new summer collection. I used the cheeky stamp plate #CH20 for the pineapple.

 I recently took a hand painting class and learnt this fun colour blocking technique. They even gave us new gel paints that aren’t even available for purchase yet! That’s what I used for the black. As for the colours, I again used all fuzion gels: say my name & oops, I did it again from the new summer collection and then neon green!

 This set is so fun and sparkly! With the added stamp it’s perfect for summer! You can’t tell from this photo, but the blue turns to green when it’s hot! So fun for summer. And of course I used all fuzion gels: envy chameleon colour changing gel, rockstar Sparklez gel & finished off with Swarovski crystals & a caption stamping plate.

  Colour changing gels are super popular in the summer. Especially the suncatchers! They change in the sun, so that it so fun! I used fuzion suncatchers gel in Aloha! Inside it is that lovely light peachy coral & outside it turns to a bright magenta! I finished off with some rubber flowers that go smooth once you finish file!

I hope you liked this post & maybe got some inspiration for your next set! Feel free to follow me on Instagram @saramarienails or on Facebook @Sara Marie Nails

Spring to Summer Make up Must haves!


IMG_8151

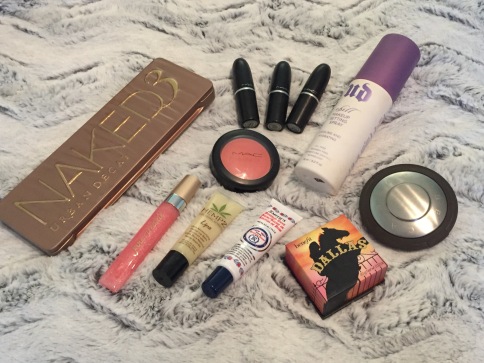
As the weather gets warmer, I find myself spending less time on my make up & more time trying to stay cool! My make up bag seems to get lighter and I am totally okay with that because I have a great little make up army ready to spring into action when I need! I like to keep my colours very fun but not crazy, because well.. it does not matter how many youtube videos I’ve watched.. I ain’t no Beauty Guru! But here are my fool proof, make up must haves for this season!


IMG_8153

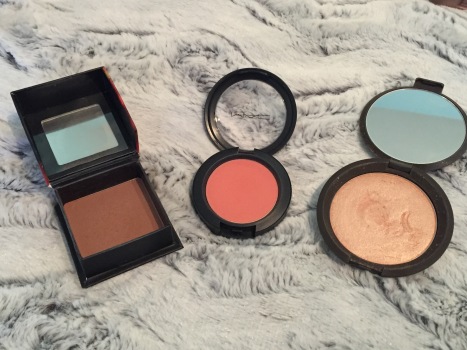
  • Bronzer/Blush: Benefit Dallas Box`o Powder Blush, I personally use this as a two-in-one product. I can use it as both a bronzer and blush on those days when I cannot be bothered to have a ton of product on my face or use it only as a bronzer for a subtle rosy bronze look! – $36 CAD
  • Blush: MAC Powder Blush in “Peaches.” This sheer tone blush is perfect for summer! It transitions so nicely while your skin gets tanned! The peach tone is super flirty and you don’t need a lot of product for a great colour pay off! – $26 CAD
  • Highlighter: Becca Champagne Pop is my go to no matter the season! This highlighter has a soft white gold colour with a pinky peach undertone. One swipe of this on my cheek bones and I am ready to conquer the day! – $46 CAD


IMG_8152

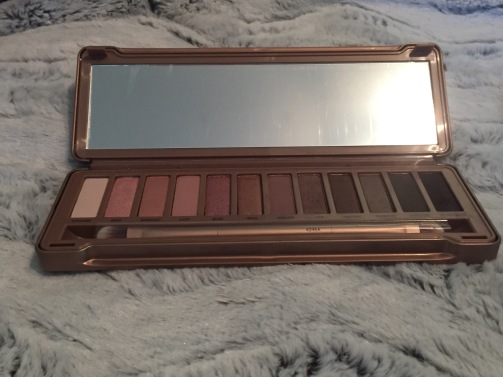
  • Eyeshadow Palette: Urban Decays Naked 3, do we see a pattern here? Everything is rose toned?? Anyways, this palette is a MUST. Actually any Naked palette is a must. They are honestly fool proof. You can mix any colours in the palettes and its gonna look amazing! The rose tone is also a fun way to switch up your daily look! – $66 CAD


  • Hempz Herbal lip balm: Great for moisturizing lips before a lipstick application, I got mine at a local spa for $10 CAD
  • Jane Iredale PureGloss Lip Gloss: A great way to add shimmer to your lips without a sticky mess! – $33 CAD
  • Smith’s Rosebud Salve: Get rid of those unwanted dry lips from allergies & weather changes. This salve will change your life! Make sure to buy the tube and not the tin, much easier for application. – $7.50 CAD
  • Mac Lipsticks: I love the creamy textures of Mac’s lipsticks! Here’s my favourite shades this season. Kinda Sexy: a neutral pinky-rose nude, perfect for an every day make up look. Runway Hit: a light nude with a matte finish. This is a “natural lip colour but better.” Plumful: a rose-plum lipstick, great for an evening looking without looking too heavy! All lipsticks – $21 CAD


FullSizeRender

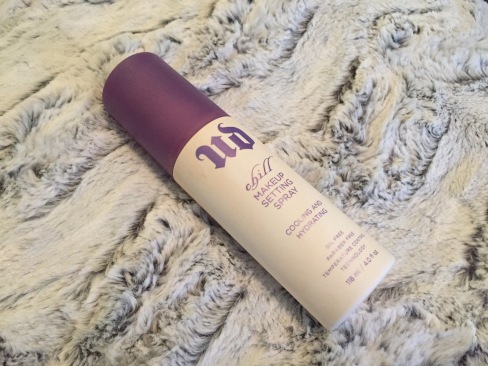
  • Finally, to set my make up. I have been obsessed with Urban Decays “Chill” make up setting spray. This is great for a dry/combination skin type like myself! Helps my make up stay in place while adding a cooling & hydrating effect! – $30 CAD


I hope you enjoyed my Make Up Must Haves! What are your favourite produce this season?

IMG_7656


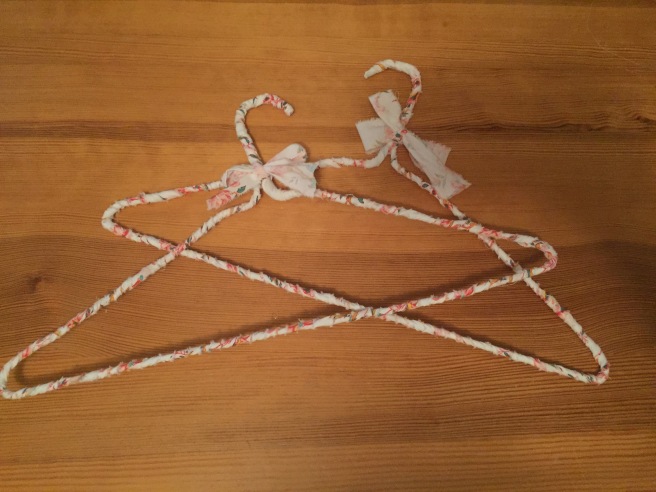
Cute DIY Brandy Melville Inspired Hangers

I LOVE shopping at Brandy Melville. Every time I go to Vancouver I will beg my boyfriend to come with me to my favourite store! The T-shirts are incredibly soft and I could basically live in them.. and well, I do have enough to almost get away with that! The decor of the store is also right up my ally! It has a very beachy/shabby chic vibe to it!


DSCN4173-1024x768

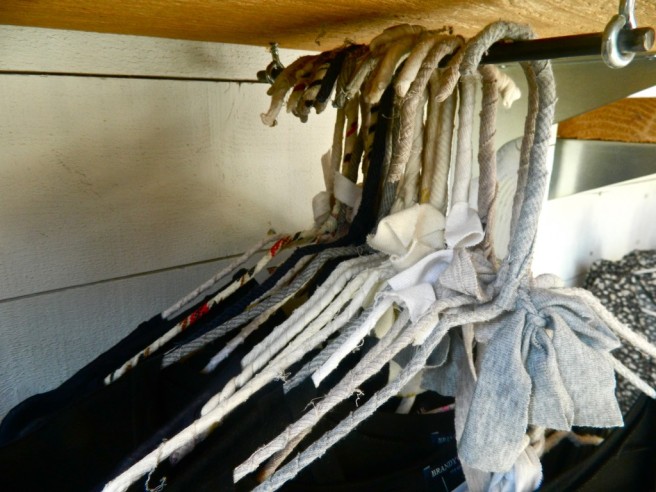
My favourite decor feature is their hangers! They are absolutely adorable and serve a great purpose! Because a lot of the shirts are wide necked,the fabric hangers hold on to the clothing so they won’t slip off! I thought this would be a great way for me to get my clothes to stop falling & add a touch of girly-ness to my closet!

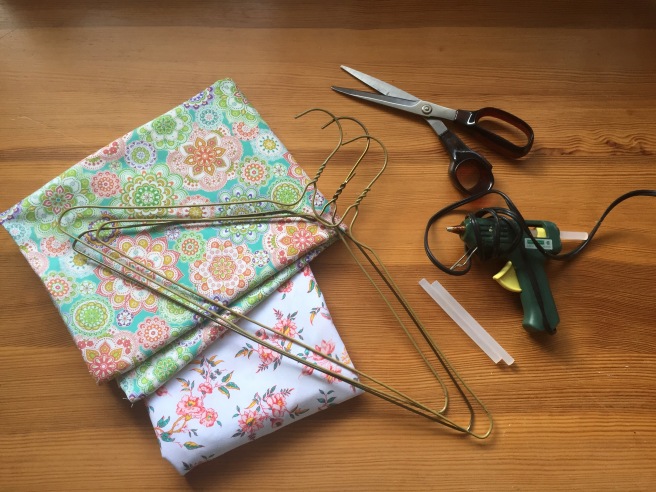
This DIY is suuuuuuper easy! All you need is:

  • Fabric – preferably cotton, I picked up 2  1 meter x 1 meter squares for under $10 CAD a piece, next time I will order off of amazon (much more affordable)
  • Metal Hangers – plastic would work too, just be thicker. I stole these ones from my boyfriend`s closet & replaced his with some plastic ones.
  • Any kind of scissors that will cut fabric
  • Glue gun & glue sticks image1


Step one: Cut 1 inch sections and pull to cut, this creates a frayed edge & is much easier than cutting. Just make sure to cut the first inch to make this process a lot easier. I pre-cut a whole pile so that I wouldn’t have to cut as I went.


Step two: Place a bead of hot glue right below the hook, start wrapping the fabric around. I suggest going up the hook and coming back down. Because this part will be getting lots of use, doubling up the fabric will protect it! Keep putting little beads of glue throughout the hanger to keep it tight and secure!


Step three: When you run out of a strip, just glue on another! I found glueing the 2 strips together made it much easier! Just make sure to let it dry a little before wrapping or it will come undone and burn you (like it did to me.. sorry fingers)

Step four: When you get to the end, wrap the fabric around once more to camouflage  any free space. Cut the fabric very close to the hanger and apply some glue. Firmly press the fabric down so that it lays completely flat! You should not be able to see where it attached!


Step five: Feel free to tie a bow around the hook to add that extra girly touch & voila you are finished! Once I got the hang of it, these only took about 2-3 minutes each!

image2765

I hope you enjoyed this easy & super cute DIY!


IMG_7656


Easy DIY Easter Egg

IMG_0232

I love spring, I love the cute colours & of course all the chocolate the easter bunny brings. I remember being a kid and being so excited to make easter eggs.. but after a week they were gross and we had to throw them out. This was always very upsetting because I was always so proud of my art work that it felt like such a shame throwing it away.

Now as a 22 year old adult, I still love decorating easter eggs. I’m gonna show you how I made some super cute eggs that can be packed up and saved for next year! These are great for making for kids too, they won’t break if they’re dropped! So let’s get started!

IMG_0214

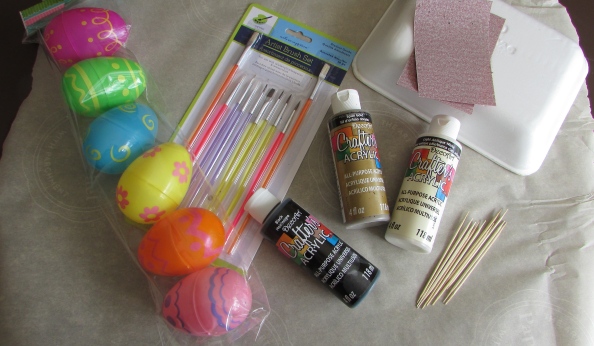
Most of the supplies I found at my local dollar store & at home!

  1. Plastic Eggs, 6pk $1.25 CAD
  2. Paint brushes, 1o pk $1.25 CAD (or anything to paint with)
  3. Any acrylic paint $1.25 CAD each, I choose white, gold & black
  4. Sand paper *very* important, tooth picks, styrofoam meat container (clean) & paper to protect your table *all this was found at home.
  5. Glue, I forgot to picture this but any glue will work. I found super glue and used that.


  • Step 1: Open up the eggs and glue them shut, this will make sure that they don’t come apart and wreck the design!
  • Step 2: This is very important! Sand the eggs so that they are no longer shiny. If you don’t the paint will have a very difficult time sticking to the eggs.
  • Step 3: My eggs had holes in the bottom, I took toothpicks and put them through the holes and then placed them in the styrofoam. This was so that they could dry better.


  • Step 4: Start painting your base layer, I choose white. My eggs needed about 4 coats of paint in total so this is the boring part. If making these for kids I suggest doing this before hand so they are ready for them to paint right away!


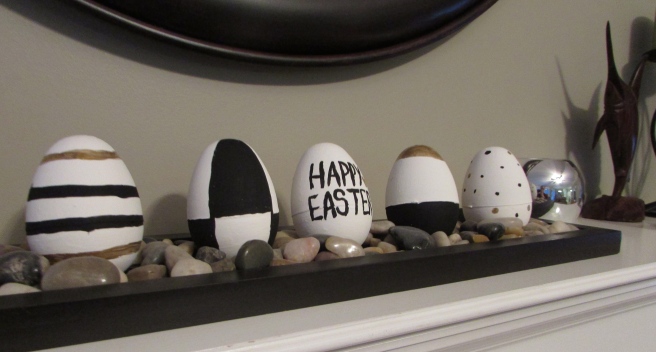
  • Step 5: This is the fun part, painting your pretty little eggies! I choose black & gold for my designs. You can do dots, stripes, chevron, cute sayings or anything you want. The possibilities are endless! Using some white glue and glitter would be super cute as well! I usually use glitter for everything but I wanted to keep these eggs simple.


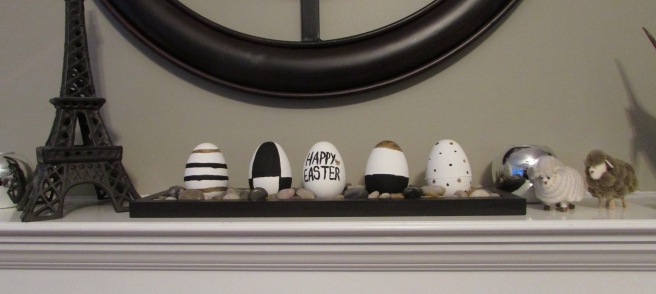
These were the designs I did for my eggs! I loved the gold & black on the white. I found it very classy and almost “Kate Spade-Esque” I let these sit over night to make sure they were 100% dry before moving them. If you wanted a shiny finish you could defiantly spray them with some clear paint spray or sealing spray. I like the matte look personally.


IMG_0230

I am so in love with the end result! These are so cute & so easy to make. I hope you all have a great easter weekend and the easter bunny brings you lots of chocolate!


IMG_7656


Top 5 spring Nail Polishes (ChinaGlaze)

FullSizeRender

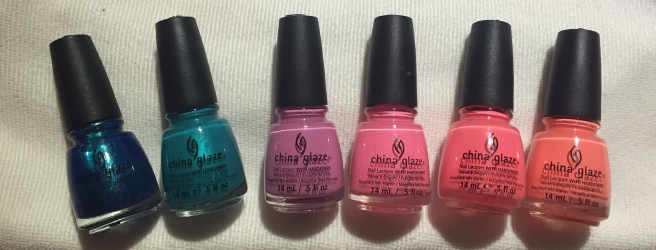
When the snow is all gone & the sun is finally shining, toes and fun spring colours come out! I love changing up my polish whenever the season changes. As  a nail tech though, I wear gel on my fingernails year round as it is much stronger for me to work with. My toes however, change quite often! Here’s my top 5 polishes for my toes this spring, don’t be fooled because there is 6 polishes in the photo.. read on to figure out why!

Sexy in the City: I absolutely love this blue, it has the perfect amount of shimmer! It may look dark in the bottle but it is the perfect shade for when your toes are still a little pale! Although is is shiny on its own, I do suggest always using a top coat for extra protection.

Turned up Turquoise: Turquoise is always in style! It’s a fun shade that goes with just about anything I find! This one also has a bit of a shimmer but dries on the matte side. I defiantly suggest using a top coat with this!

Dance Baby: This baby pink is great food spring (also looks great with a tan) It’s super bright and has a lovely purple tone to it. Making it great for those who are not into barbie pinks! Again, use a top coat with it for extra protection!

Shocking Pink: Now here’s your barbie pink! Not quite as bright but is a nice spring transition before the brights come out for summer. I’ll say it again.. TOP COAT THIS

Flip Flop Fantasy: This is where there is 2.. Because they have the same name. This colour is also one of the more famous of ChinaGlaze polishes. I don’t know why but they changed it.. I still love the colour though. The original formula was a beeeeautiful coral pink, I do not let anyone touch this one. It is my baby and for me only! The newer formula is more of a peach which is also very pretty! This one is a top coat must! It will chip very fast if you do not top coat it.


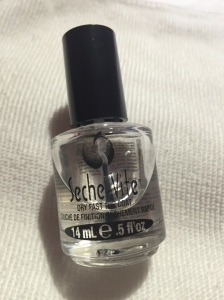
You can use a base coat if you like, I find they help prep the nail & help against staining. I change my polish so much that I’m usually too lazy to apply one shhhhh. However, top coat is a MUST with ChinaGlaze, they chip very easily. I will post a picture below of my favourite top coat.

IMG_7808

Seche Vite Fast Drying Top Coat: This is a must have! Dries very quickly and creates a beautiful shine! It is also very strong and durable!

 

All the ChinaGlaze polishes are available for $8.25 CAD on http://www.nailpolishcanada.com they also have free shipping on orders more than $25 & it is a canadian website so if you’re ordering from canada.. No duty or crazy exchange rates!!

Seche Vite is also available on http://www.nailpolishcanada.com for $8.95 CAD

For places other than Canada, I suggest looking on Amazon or checking out local beauty supply stores.


Hope you all enjoy your fresh spring toes, xo

The tea addiction.

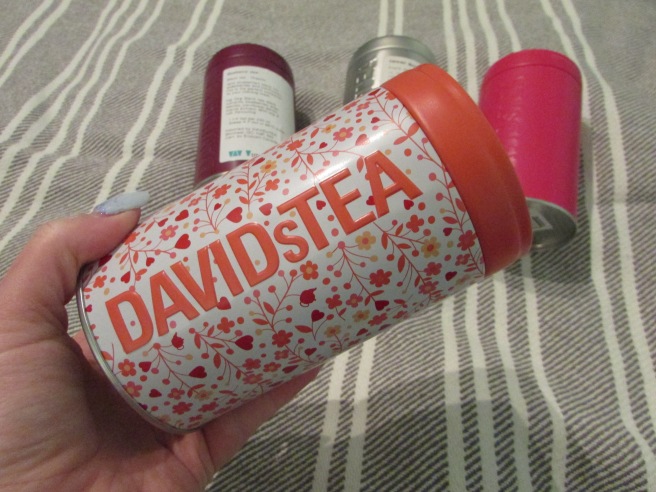
There’s nothing I enjoy more than a hot cup of tea when I wake up.. with my lunch.. after work.. or before bed. To be honest I don’t think theres’s ever a wrong time for tea. I myself, have over 30 types of tea mostly from DavidsTea. This may seem a tad excessive but personally I don’t think there’s such a thing as too much tea.

IMG_0204

I do have other teas than DavidsTea, but their teas just seem to take up the most room in the cupboard. If you have never been to one of their stores, I highly recommend googling where the closest one is and going straight there. I’ve been to a few different stores and I am always so impressed with the staff there. They are always so helpful with finding the perfect tea selection. The stores are also stocked full of everything you need to prepare your perfect tea experience.  I was able to go through my teas and pick my top 4 and my top tea accessories, all available at DavidsTea!

1.)  Blueberry Jam: This black tea is my favourite tea for the morning. This tea goes perfect with toast & eggs! You don’t need to put much in this tea, I enjoy it black or with a little almond milk & sugar. 50g $8.98 CAD

2.) Santa’s Secret: I don’t know how I just found this tea a few months ago. This tea is my ride or die. This is another black tea with vanilla & the CUTEST little candy cane sprinkles! I bought 150g of this after christmas because it was dirt cheap then (I got 150g for $9 WHAT?)  Unfortunately this tea is only available during the winter but when it comes back you need to get some! 50g $7.50 CAD

3.) Forever Nuts: This herbal tea is the apple pie of all teas.. it seriously tastes like like a warm cup of apple pie but.. liquid form? that does not sound as appetizing as I thought I was. Anyways, this tea is absolutely fantastic though. It has beetroot in it so it turns a lovely shade of pink. Just a little honey and this tea is great for before bed as it has no caffeine in it. 50g $7.98 CAD

4.) Pink Flamingo: Not all tea has to be hot so I thought it would only be right to include my favourite tea for making iced teas. This herbal tea smells just like iced tea mix! It is perfect for hot summer days. The hibiscus flower & tangerine blend together perfectly, this tea also has beetroot in it and it also has carrot! 50g $7.98 CAD

P.S. How cute are these tins?! With every 100g of tea you buy you get a free silver tin, or you can upgrade to a coloured tin for $3 CAD.

IMG_0211

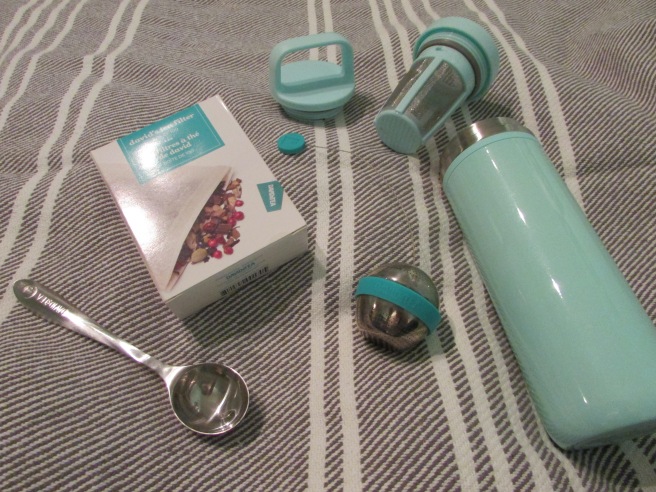
There’s so many ways to make tea, here’s a few tea tools to get your tea time starter:

1.) The Perfect Tea Spoon: Now you don’t actually need THIS spoon, you should use a spoon though to measure or you’ll find yourself using way more than you need. You can use a regular spoon, I got mine in a holiday pack. $6 CAD

2.)  Tea Filters: I try not to use these all the time, so I am not throwing away too much waste. But they are great for when you’re taking tea to go! 100pk $12 CAD

3.) The Perfect Tea Ball: I love using my tea ball for when I’m making tea to enjoy at home. It’s super easy to use and clean! I like that it all comes apart so I can really get it all clean. I also love that I’m not throwing away a tea bag each time. It’s also got vey fine holes so you don’t get any tea chunks in your tea. $10 CAD

4.) The Carry Tea Mug: DavidsTea is always coming out with fun new colours and designs for their tea accessories. I love their to go mugs because they keep your drink as hot or as cold as you want it! They also has a built in steeping chamber so you don’t have to have any waste. I wouldn’t recommend putting black tea in the chamber though as they tend to get bitter over time. These mugs also don’t leak so you can feel free to throw it in your bag for later with no worries of spilling. $32 CAD


IMG_0213

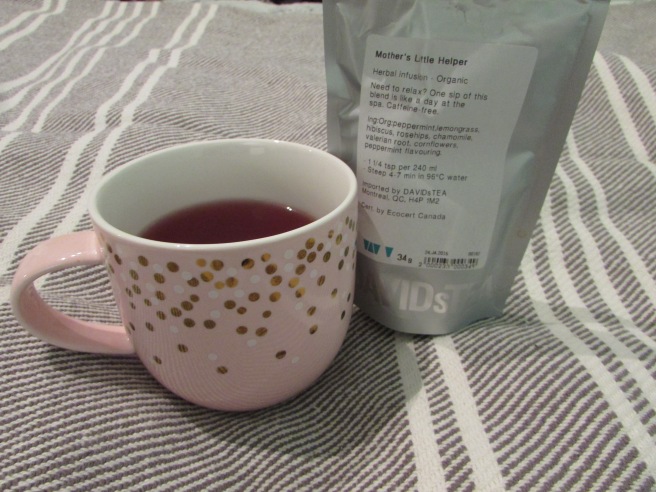
As I sat down to write this I was enjoying a cup of “Mother’s Little Helper” in my adorable dotted cup that I received for Christmas from a lovely friend of mine.

xo Sara

DIY Succulent Garden


Untitled

I love plants, but I am a very bad plant mom. I constantly forget to water them so they die usually within the first couple weeks. After many pretty flowers wilting away I decided to try something different.. A cactus! I’ve had my first cactus for a few months now and it is doing great! This gave me the idea of making a little succulent garden to put in my room!

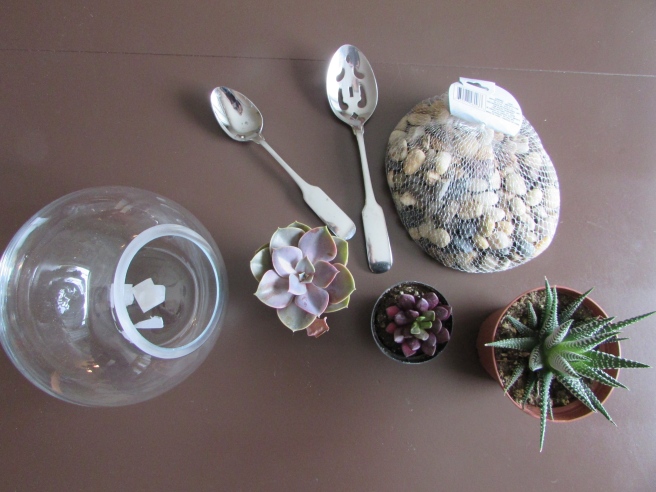
Its pretty easy to do and saves a lot of money by making it yourself! Here’s what you’ll need:

  • Succulents. I bought mine from garden centres, $6-10 CAD
  • Glass orb or whatever you would like the plants to be in, Winners $14.99 CAD
  • Pebbles or anything to cover the dirt, DollarTree $3 CAD
  • Spoons for scooping the dirt
  • Newspaper or table cloth if you are doing this inside. I forgot about this part and had to vacuum when I was finished.

IMG_0161


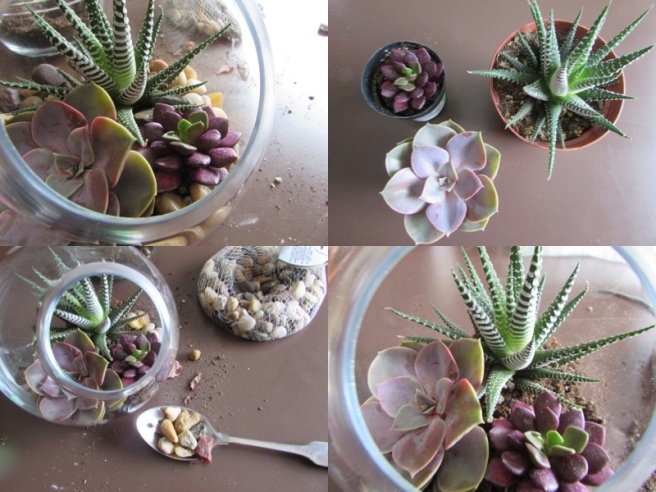
First I started out by removing the plants and excess soil from their roots, being very careful to not hurt or damage them. I then placed about 2 inches of dirt in the bottom of the glass orb.

I then played around with the placement to figure out where I wanted each plant to sit. When I finished this I added some more soil and made sure the roots were covered.

The spoons make this part a lot easier, since there wasn’t much room for my hands to fit in, I was able to move the plants & soil around much easier. Following this step I used my spoon to place my stones around the plants. I tried to make the soil lower near the sides so that the dirt would be hidden and would have a much cleaner look.

I spent a few minutes moving the stones and finding the perfect balance. The end result was exactly what I was looking for! These mini gardens are great for when you have a small space and can’t have anything to large. You could also macramé a hanger and have multiple orbs hanging to save even more space!


I hope you enjoyed this little mini walk through, xo Sara

My Favourite Skincare Products.

My skin had always been a constant battle for me. I never had bad acne growing up but I did have dehydrated and dull skin. I am also a picker.. so every small blemish I did somehow get, turned into a nasty scar. As a teenager I also listened to whatever anyone told me about my skin. So there I was thinking I had dry skin and I used a “acne fighting” cleanser and the same moisturizer my mother used. I should probably tell you that she has oily skin, so this was not working in my favour.

FullSizeRender

Let’s skip to April of 2015. I had just started working at a spa 2 days a week. In this spa they carried a bunch of fancy products that I did not believe were any better than my $5-10 drug store products. Not saying that those do not work, they just don’t work for me. One of the products that this spa carries is called Dermalogica. I regret not believing in this brand sooner. Not only are their products AMAZING but as a company they care so much! This isn’t a company that just throws their products on the shelf in colourful bottles with smiling pictures and hopes people are gonna buy them. Dermalogica holds classes; these classes are to teach retailers & skin therapists more about their products and how to properly prescribe these products to costumers. They also have very simplistic packaging with no gimmicks because they know their products are amazing and they don’t need to trick you into buying them.

IMG_7339

After learning that intact my skin was not dry but dehydrated with oily spots, I threw out all my old products and began my Dermalogica collection.  The first month was hard, I wasn’t used to these products and my skin was like WTF?! Once I got a routine down and my skin got comfortable, I started to notice the changes. My make up stayed on longer, my face no longer felt tight and dry & I started to feel confident in my skin.

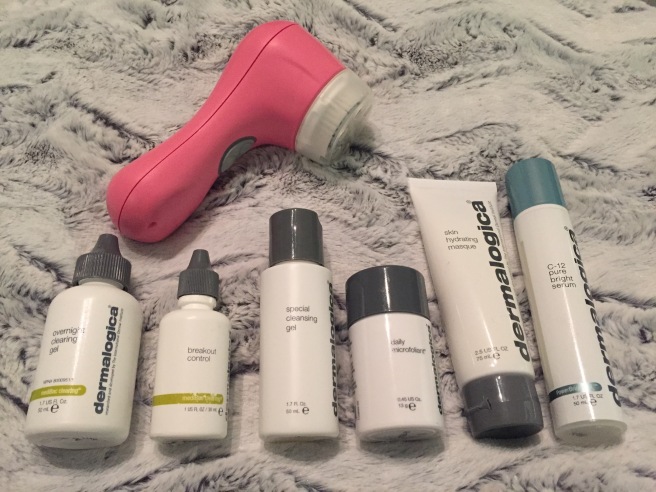
Above are my ride or die products at the moment & my beautiful clarisonic *insert heart face emoji right here* I’ll explain why they are below!


Clarisonic Mia 2: This little machine is a little magic maker! I thought my face felt clean after cleansing until I used one! With 2 speeds & a timer its the easiest part of my skin care routine. The full cycle is 1 minute : 20 seconds forehead, 20 seconds nose/chin & 10 seconds on each cheek. The clarisonic helps bring all the impurities to the surface so I did notice a bit of breaking out at first, but once used regularly it was gone. $180 CAD on sephora.com

Overnight Clearing Gel: I use this overnight treatment to help reduce excess sebum (oily substance). I’ll apply this under my night time moisturizer after apply my toner. Honestly, I can say that this is my miracle in a bottle! The gel texture makes it easy to apply and has a very hydrating feel to it, it also smells great! $64 CAD on dermalogica.ca

Breakout Control: This is a spot treatment, but no worries you won’t look like Miley Cyrus and her oh so famous, zit cream insta selfies. Apply a thin layer of this product am/pm and you’re good to go! Yes, you can wear this under make up & say goodbye to those unwanted spots. $60 CAD on dermalogica.ca

Special Cleansing Gel: This is my holy grail cleanser. Pair this with my clarisonic and I feel on top of the world. Just a pea sized amount and my whole face is squeaky clean. If you love a foaming wash this is a great product to try. 16oz $68 CAD (price unavailable on website so this is my best guess)

Daily Microfoliant: A daily?? exfoliant?? yes you read correctly. This exfoliant is gentle enough to be used everyday! It gets ever better, this is a dry product. First, you sprinkle the product into your hand and add a little bit of water to create a creamy paste. Massage this all over your face for a minute and voila! I recommend using this product in the shower, as it tends to be a little messy. 75g $74 CAD on dermalogica.ca

Skin Hydrating Masque: Every few night I like to sleep with this masque on to help plump up my skin with moisture. It’s thin enough that it can be applied like a moisturizer & won’t make a mess of your bedding. The lovely cucumber scent is also very refreshing and makes me feel like I’m at a spa! 75ml $54 CAD on dermalogica.ca

C12 Pure Bright Serum: This is my luxury product. My liquid gold. I have some pigmentation on my face from my picking habits & so this product was a must for me to try! I kept putting it off because of the price. But once I realized how little you need, I knew this product would last me forever. I’ve been using this product for just over a month now & I have noticed a small change in my spots! I can’t wait to see what it will be like in the future! 50ml $120 CAD on dermalogica.ca

If you have any questions, feel free to comment below, xo Sara